出于众所周知的原因,现使用OpenConnect Server(ocserv)作为服务端,Shimo(macOS)、anyconnect(win、iOS)作为客户端,搭建个人电子设备装机必备环境,实现按需路由:”大局域网”走本地网关默认路由,特定应用(IP)走域外VPS作为基础的ocserv出口。
OpenConnect server (ocserv) is an SSL VPN server. Its purpose is to be a secure, small, fast and configurable VPN server. It implements the OpenConnect SSL VPN protocol, and has also (currently experimental) compatibility with clients using the AnyConnect SSL VPN protocol. The OpenConnect protocol provides a dual TCP/UDP VPN channel, and uses the standard IETF security protocols to secure it. The server is implemented primarily for the GNU/Linux platform but its code is designed to be portable to other UNIX variants as well.
OpenConnect server (ocserv)以一款SSL VPN服务。它的目的是构建安全、小巧、快速以及容易配置的 VPN服务器。它实现了OpenConnect SSL VPN协议,并且也兼容AnyConnect SSL VPN协议客户端。 OpenConnect协议提供了基于TCP/UDP的双重VPN隧道,使用标准的IETF加密协议。该服务主要面向 GNU/Linux平台。
1 基本环境
CentOS Linux release 7.2.1511 (Core) (IP: 1.1.1.1)
ocserv 0.11.9
macOS High Sierra Version 10.13.2
iOS 11.2.1
Microsoft Windows 10 专业版 (10.0.15063)
anyconnect-win-4.4.03034
Shimo Version 4.1.5.1
2 ocserv安装 2.1 安装ocserv ocserv可以通过epel使用yum安装。
1
2
yum install -y epel-release yum install -y ocserv
2.2 配置 2.2.1 证书配置 1.创建文件夹存放ocserv所使用的证书
1
2
3
4
mkdir -p /etc/ocserv/ssl/private #用于存放服务器私钥 mkdir -p /etc/ocserv/ssl/ca #用于存放CA mkdir -p /etc/ocserv/ssl/server #用于存放服务器证书 mkdir -p /etc/ocserv/ssl/users #用于存放用户证书
2.CA证书
生成CA私钥
1 cd /etc/ocserv/ssl/private
1 certtool --generate-privkey --outfile ca-key.pem
复制ca-key.pem证书到ocserv/ssl/目录
生成CA模版,其中cn和organization内容为自定义。
1
2
3
4
5
6
7
8
9
10
cat << EOF > ca.tmpl cn = "cn" organization = "organization" serial = 1 expiration_days = 3650 ca signing_key cert_signing_key crl_signing_key EOF
生成自签CA证书
1 certtool --generate-self-signed --load-privkey ../private/ca-key.pem --template ca.tmpl --outfile ca-cert.pem
复制CA证书到ocserv/ssl/目录
3.server证书
生成server私钥
1 cd /etc/ocserv/ssl/private
1 certtool --generate-privkey --outfile server-key.pem
复制server-key.pem证书到ocserv/ssl目录
生成server证书模版,其中cn内容为ocserv服务器地址,本文假定使用1.1.1.1
1 cd /etc/ocserv/ssl/server
1
2
3
4
5
6
7
8
cat << EOF > server.tmpl cn = "1.1.1.1" organization = "organization" expiration_days = 3650 signing_key encryption_key tls_www_server EOF
生成server证书
1 certtool --generate-certificate --load-privkey ../private/server-key.pem --load-ca-certificate ../ca/ca-cert.pem --load-ca-privkey ../private/ca-key.pem --template server.tmpl --outfile server-cert.pem
复制server-cert.pem证书到ocserv/ssl/目录
4.客户端证书
ocserv支持用户+密码、radius、证书认证,本文使用免密码证书认证方式。
1 cd /etc/ocserv/ssl/users
1
2
3
4
5
6
7
8
9
10
11
12
13
14
15
16
17
cat >gen-client-cert.sh <<EOF #!/bin/bash USER=$1 CA_DIR=$2 SERIAL=`date +%s` certtool --generate-privkey --outfile $USER-key.pem cat << _EOF_ >user.tmpl cn = "$USER" unit = "users" serial = "$SERIAL" expiration_days = 9999 signing_key tls_www_client _EOF_ certtool --generate-certificate --load-privkey $USER-key.pem --load-ca-certificate $CA_DIR/ca-cert.pem --load-ca-privkey $CA_DIR/ca-key.pem --template user.tmpl --outfile $USER-cert.pem openssl pkcs12 -export -inkey $USER-key.pem -in $USER-cert.pem -name "$USER VPN Client Cert" -certfile $CA_DIR/ca-cert.pem -out $USER.p12 EOF
分配可执行权限
1 chomd 700 gen-client-cert.sh
生成客户端证书 (其中./gen-client-cert.sh指脚本,user1指要创建的用户客户端名称,..指CA证书所在路径)
1 ./gen-client-cert.sh user1 ..
注: 上述生成客户端中证书过程中会提示输入密码,直接回车代表无密码。此处将生成user1.p12用户客户端证书文件
更新(2017-12-17): 在重搭检查校验过程中发现./gen-client-cert.sh user1 ..执行报错,经检查发现SecureCRT macOS 8.1版本在粘贴上述建立gen-client-cert.sh脚本时,该内容的变量部分(如:$1、$USER)会自动替换成当前用户,当然可能并不是CRT的锅~~~,解决方法为手工vi建立该脚本
按字母i进入编辑试图,粘贴如下内容,再按:wq保存并退出。
1
2
3
4
5
6
7
8
9
10
11
12
13
14
15
#!/bin/bash USER=$1 CA_DIR=$2 SERIAL=`date +%s` certtool --generate-privkey --outfile $USER-key.pem cat << _EOF_ >user.tmpl cn = "$USER" unit = "users" serial = "$SERIAL" expiration_days = 9999 signing_key tls_www_client _EOF_ certtool --generate-certificate --load-privkey $USER-key.pem --load-ca-certificate $CA_DIR/ca-cert.pem --load-ca-privkey $CA_DIR/ca-key.pem --template user.tmpl --outfile $USER-cert.pem openssl pkcs12 -export -inkey $USER-key.pem -in $USER-cert.pem -name "$USER VPN Client Cert" -certfile $CA_DIR/ca-cert.pem -out $USER.p12
将user1.p12用户客户端证书文件,通过http或者其它途径导入客户端作为登录客户端登录凭证。用户证书吊销,懒不写了,可参见文末参考文章。
2.2.2 系统配置 1.ocserv配置
备份ocserv配置文件
1 cp ocserv.conf ocserv.conf.bak.init
并使用vi ocserv.conf修改如下部分
1
2
3
4
5
6
7
8
9
10
11
12
13
14
15
16
17
18
19
20
21
22
23
24
25
26
27
28
29
30
31
32
33
34
35
36
37
38
39
40
41
# 使用证书方式认证,注销其它方式 auth = "certificate" #auth = "pam" #auth = "pam[gid-min=1000]" #auth = "plain[passwd=./sample.passwd,otp=./sample.otp]" #auth = "certificate" #auth = "radius[config=/etc/radiusclient/radiusclient.conf,groupconfig=true]" # 指定server证书 server-cert = /etc/ocserv/ssl/server-cert.pem server-key = /etc/ocserv/ssl/server-key.pem # 指定ca证书 ca-cert = /etc/ocserv/ssl/ca-cert.pem # The object identifier that will be used to read the user ID in the client # certificate. The object identifier should be part of the certificate's DN # Useful OIDs are: # CN = 2.5.4.3, UID = 0.9.2342.19200300.100.1.1 # cert-user-oid = 0.9.2342.19200300.100.1.1 cert-user-oid = 2.5.4.3 # 设定客户端分配地址段,按需分配。本文使用10.20.30.32/27,别问我为什么,任性 ipv4-network = 10.20.30.32 ipv4-netmask = 255.255.255.224 # 设定客户端使用dns,按需配置 dns = 8.8.8.8 dns = 9.9.9.9 # 设定路由,此处按需配置,defalut代表默认所有走vpn route = default #route = 10.10.10.0/255.255.255.0 #route = 192.168.0.0/255.255.0.0 #route = fef4:db8:1000:1001::/64 # 设定vpn客户端不走vpn通道部分,按需 #no-route = 192.168.5.0/255.255.255.0 # The following options are for (experimental) AnyConnect client compatibility. cisco-client-compat = true
注意: route、no-route不能同时使用
2.系统配置
开启系统转发,在文件插入net.ipv4.ip_forward=1,并刷新配置sysctl -p /usr/lib/sysctl.d/00-system.conf
1 vi /usr/lib/sysctl.d/00-system.conf
1
2
3
4
net.bridge.bridge-nf-call-ip6tables = 0 net.bridge.bridge-nf-call-iptables = 0 net.bridge.bridge-nf-call-arptables = 0 net.ipv4.ip_forward=1
1 sysctl -p /usr/lib/sysctl.d/00-system.conf
防火墙配置
1
2
3
4
5
6
7
8
9
10
firewall-cmd --permanent --zone=public --add-port=443/tcp firewall-cmd --permanent --zone=public --add-port=443/udp firewall-cmd --permanent --zone=public --add-masquerade firewall-cmd --reload #以下常用检查命令,非搭建本ocserv必须执行部分 firewall-cmd --zone=public --query-masquerade # 查看某区域是否开启masquerade firewall-cmd --get-active-zones # 查询区域信息 firewall-cmd --zone=public --list-ports # 查看开发端口信息 firewall-cmd --list-ports
注: 本文使用环境centos 7.2 最小化安装搭建,系统默认防火墙为firewalld,而大多vps主机可能无firewalld。然后在搭建ocserv服务查找资料过程中发现,大多网文的做法是卸载firewalld改用iptables,不科学、不合理吧,所以咯,自己动手。同理,很多文章只介绍如何搭建ocserv服务,却没有说明客户端如何使用,靠,,,再次自己动手,本文尽量做到完整, 全面。
启动ocserv服务
1
2
3
4
5
6
7
8
systemctl start ocserv # 启动ocserv服务 systemctl status ocserv # 查看ocserv状态 systemctl enable ocserv # 设置ocserv开机自启动 #以下常用检查命令,非搭建本ocserv必须执行部分 systemctl restart ocserv # 重启ocserv服务 ss -anp |grep 443 # 检查端口为443的网络活动 ps -ef |grep ocserv # 查找名为ocserv的进程
3 客户端使用 导入前文生成的user1.p12作为终端登录凭证,本文分别使用anyconnect、shimo、anycommect作为iOS、macOS、win客户端。并利用win IIS作为iOS anyconnect下载证书的web平台。当然读者可用ocserv服务器搭建ngnix或者其他什么的作为web。为什么是iis,因为其它的不熟,,,
3.1 客户端导入用户证书 使用sftp下载user1.p12到本地(win10)
1 get /etc/ocserv/ssl/users/user1.p12
IIS搭建
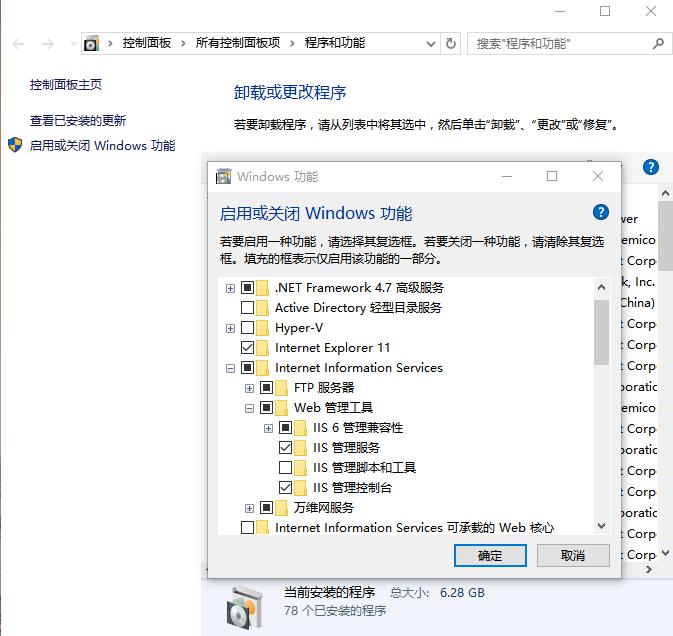
鼠标右键任务栏‘开始按钮’>应用和功能>程序和功能>启用和关闭windows功能
勾选Internet Information Services>确定
单机任务栏开始菜单>windwos管理工具>Internet Information Services管理器
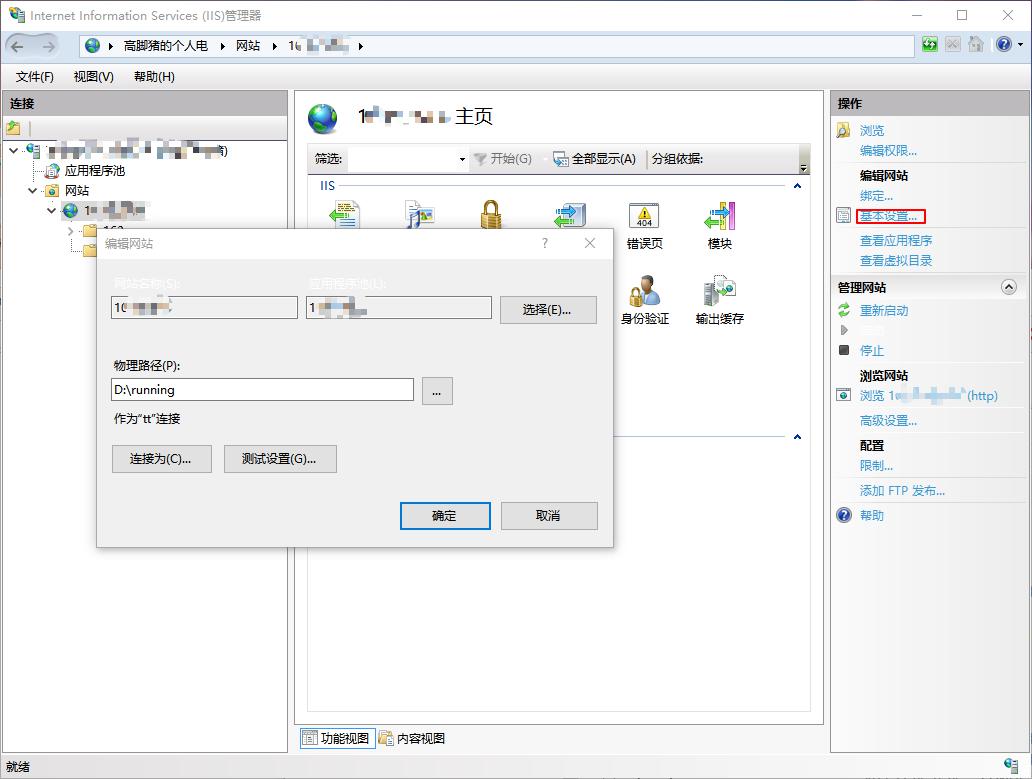
展开网站,选中默认网站,单机右侧“基本设置”
如下图设置,其中路径自定义指定,并把user1.p12移动到该目录,“连接为…”设置web默认使用什么账户权限,可临时使用administrator,客户端获取证书完成后再关闭web或者卸载iis。
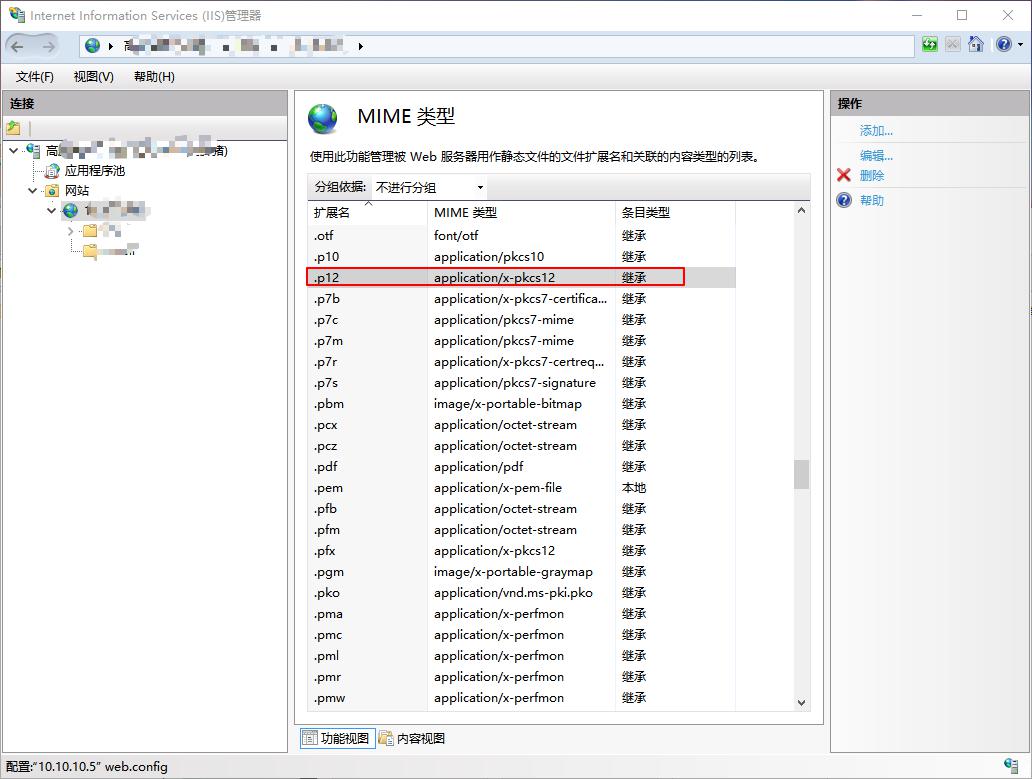
双击“MIME类型”设置,后缀*.p12iis的处理方式,添加后缀为p12类型为application/x-pkcs12
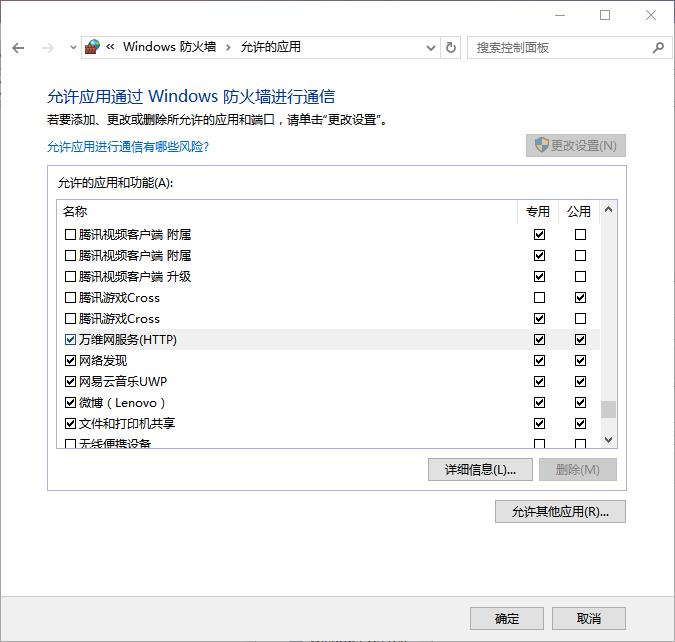
开放本地防火墙80端口,允许客户端访问下载用户证书文件
鼠标右键任务栏网络图标>打开网络和共享中心>windwos防火墙>允许应用或功能通过windws防火墙>更改设置>勾选或添加万维网服务。
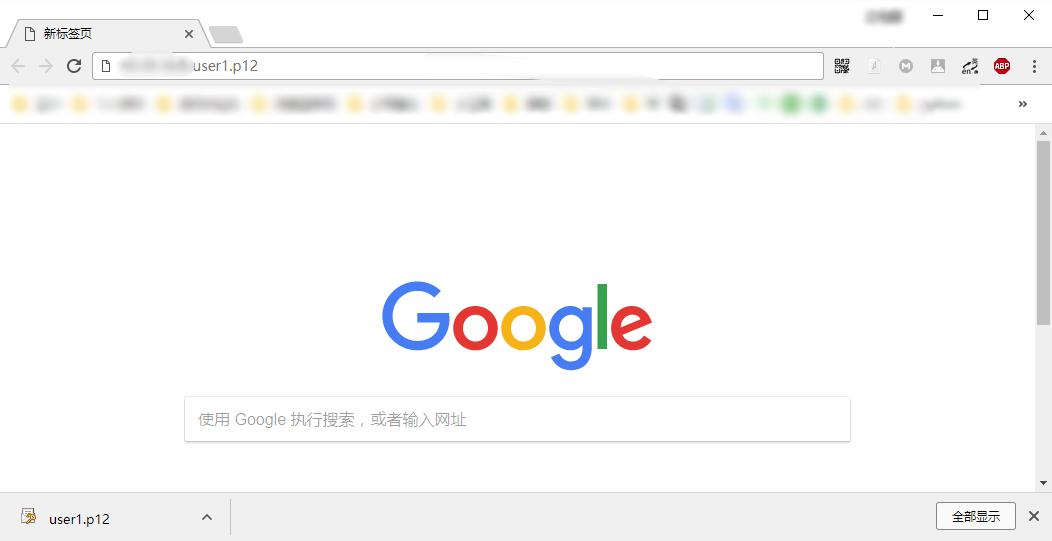
打开浏览器,下载验证
3.2 使用ocserv 万里长征最后一里,终于到客户端步骤了。
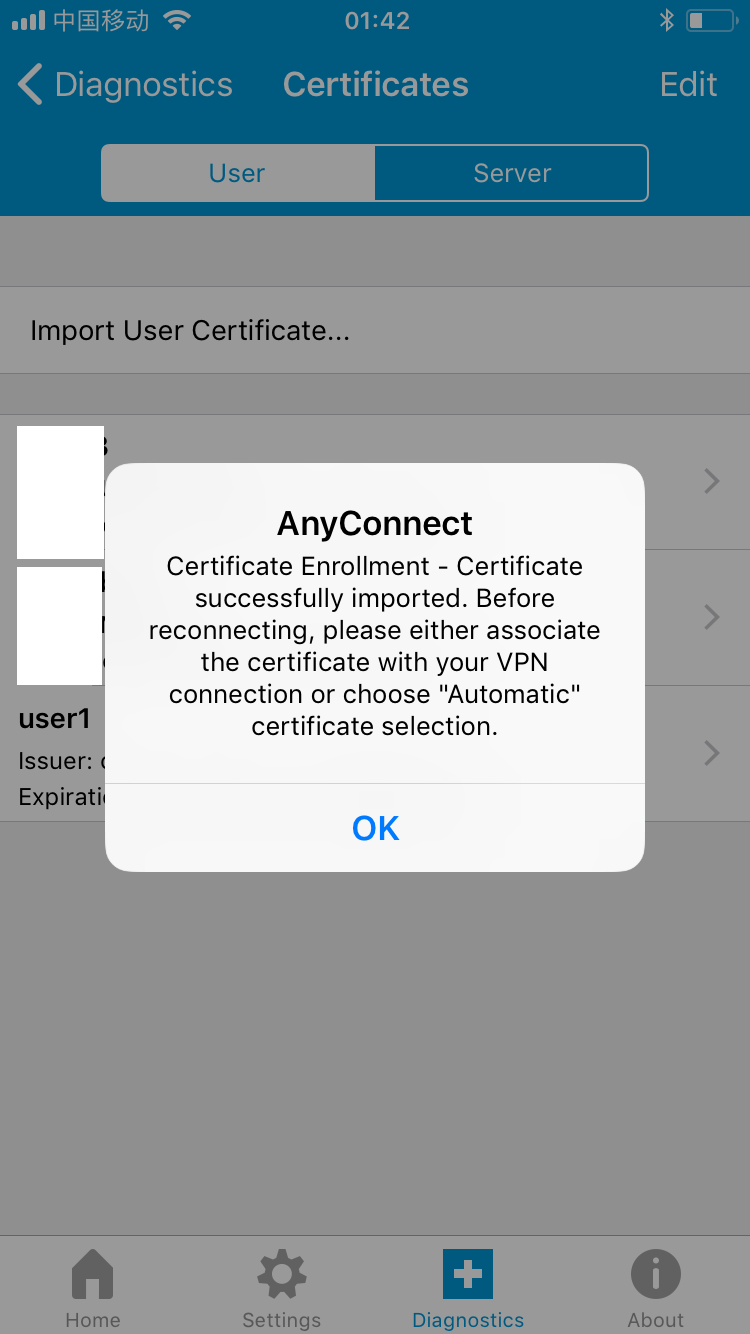
3.2.1 iOS客户端使用 app store 下载客户端“AnyConnect”,启动应用.
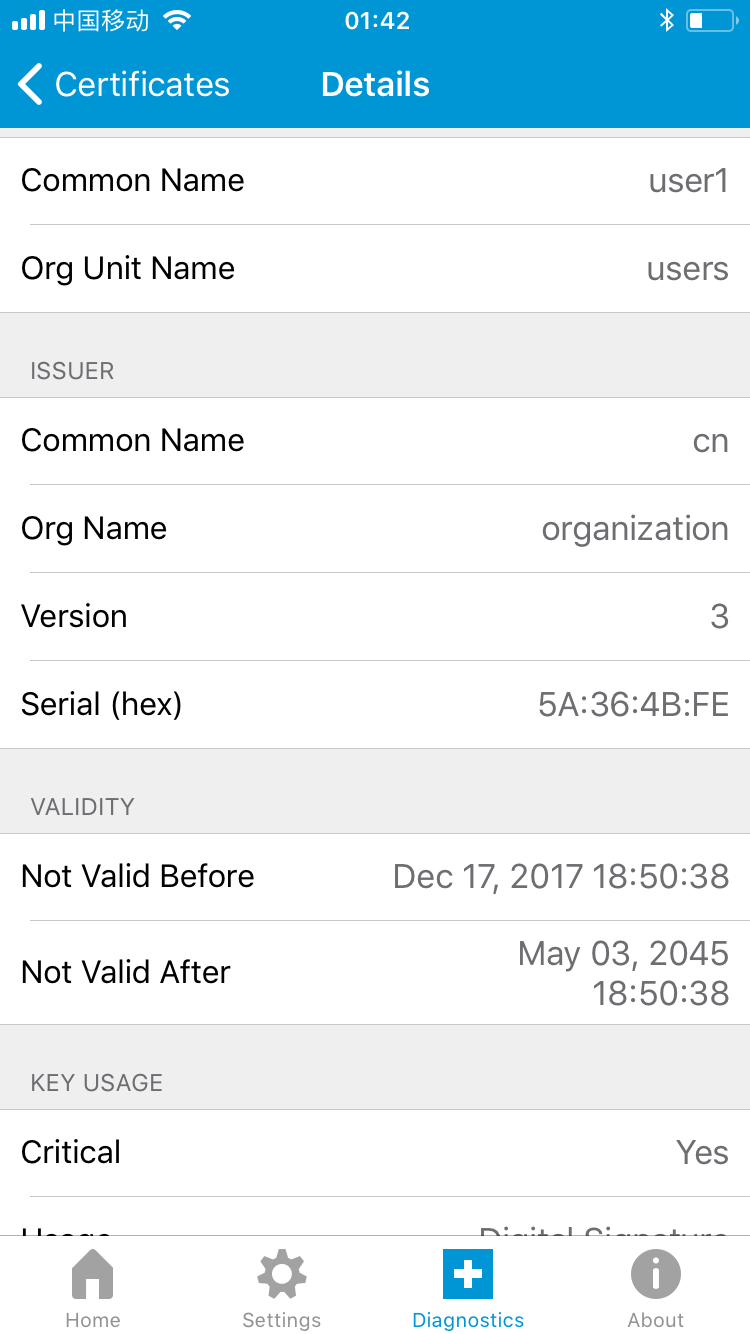
Diagnostics>Certificates>import user certificate…>输入下载地址“http://x.x.x.x/user1.p12”
Home>connections>Add VPN Connection…>填写服务器信息:描述、ocserv服务器地址>Advanced>Certificate>选中“user1”>保存
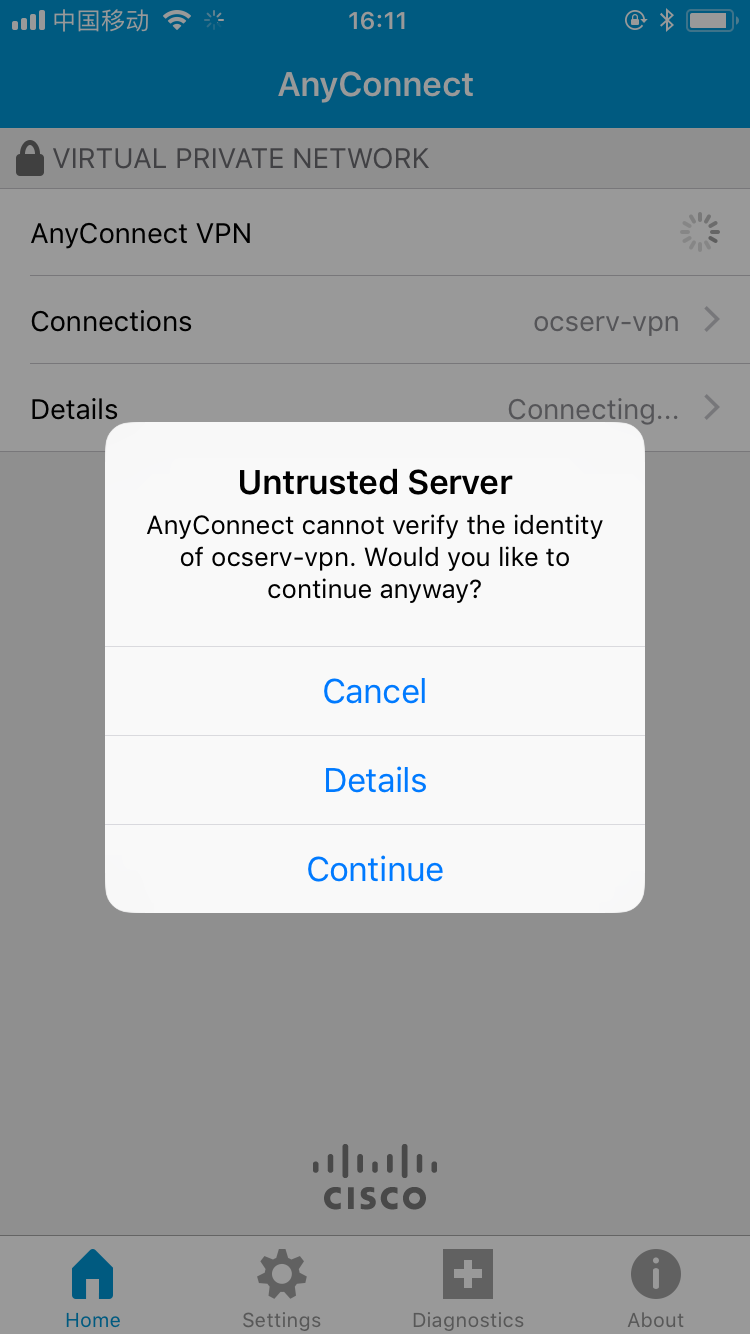
启动vpn连接 Home>AnyConnect VPN,并选择 Continue继续
客户端详细信息可以在 Details>Statistics查看
3.2.2 mac客户端使用 下载并安装、运行Shimo应用,
单机任务栏Shimo>Preferences>Accounts>左下角+>Cisco SSL>Create…
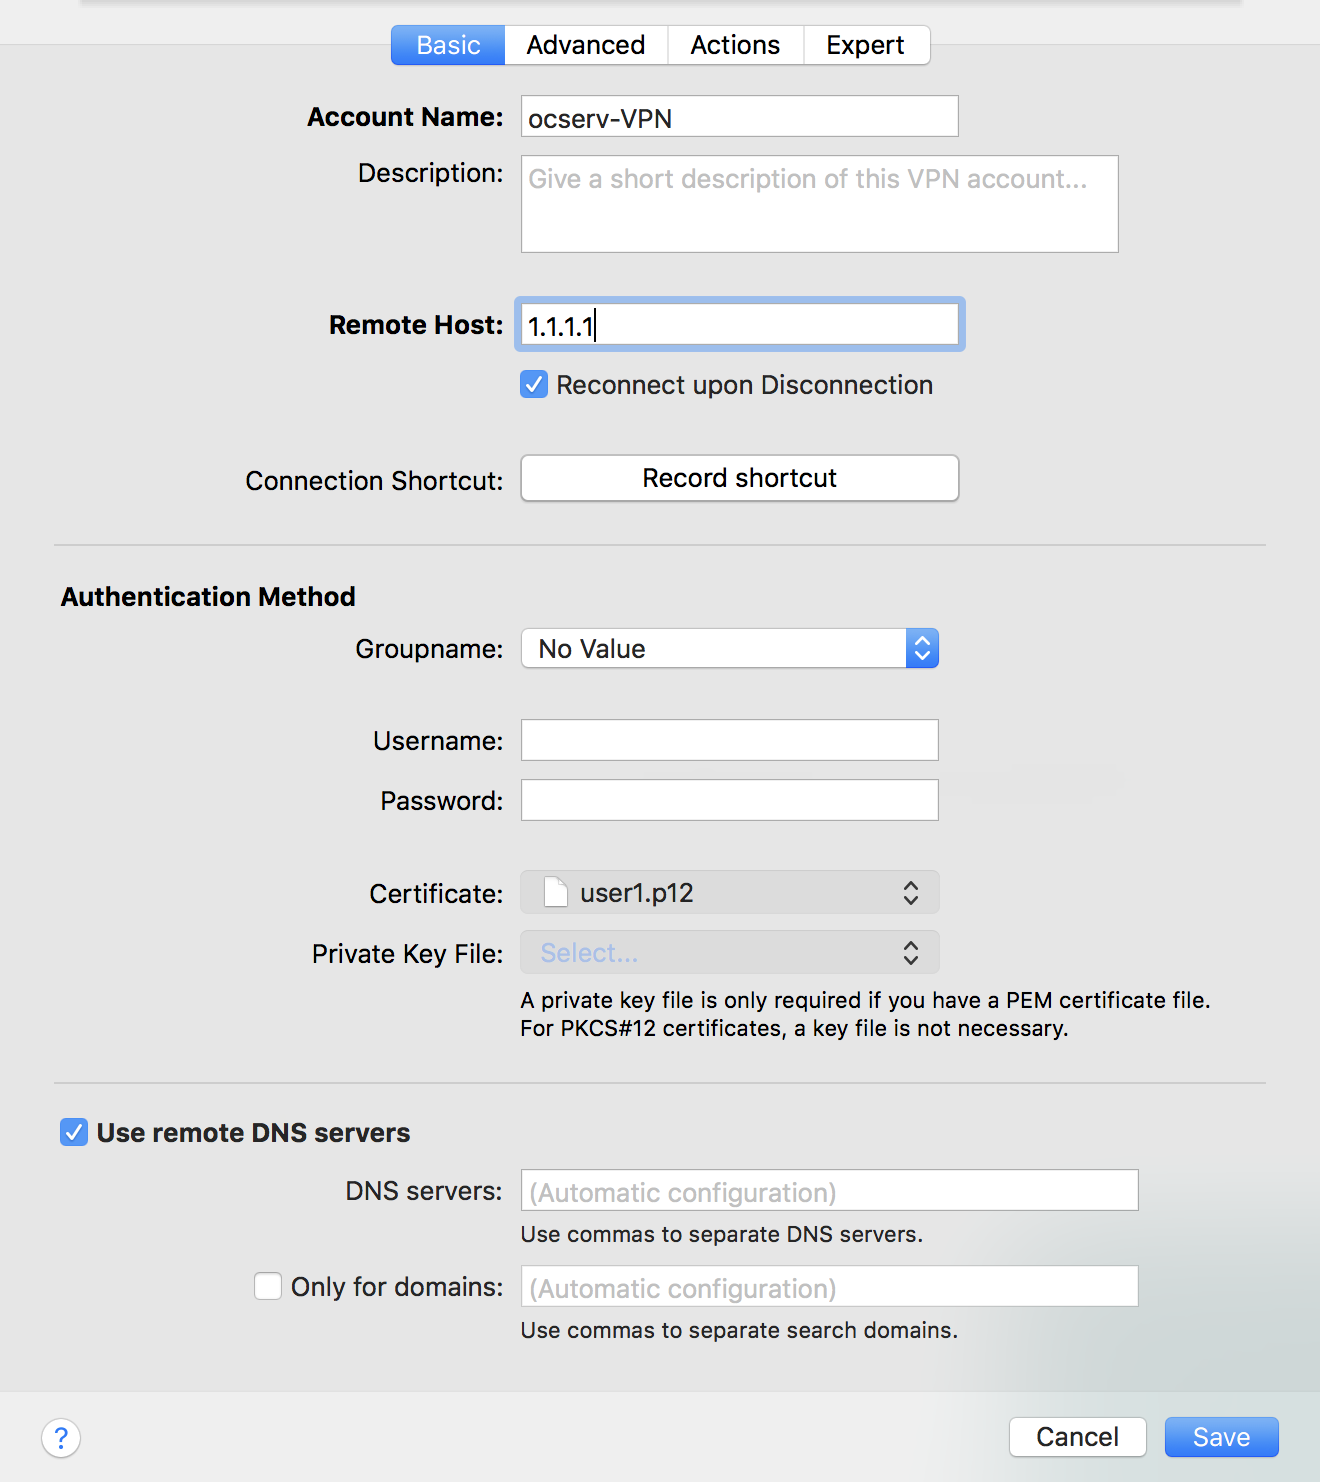
输入服务器地址,本文使用证书登录,故用户、密码留空,单机 Create
选中刚刚创建的条目,右下角单机Edit,在basic栏目,Authentication Method项目中的Certificate指定用户证书user1.p12,保存
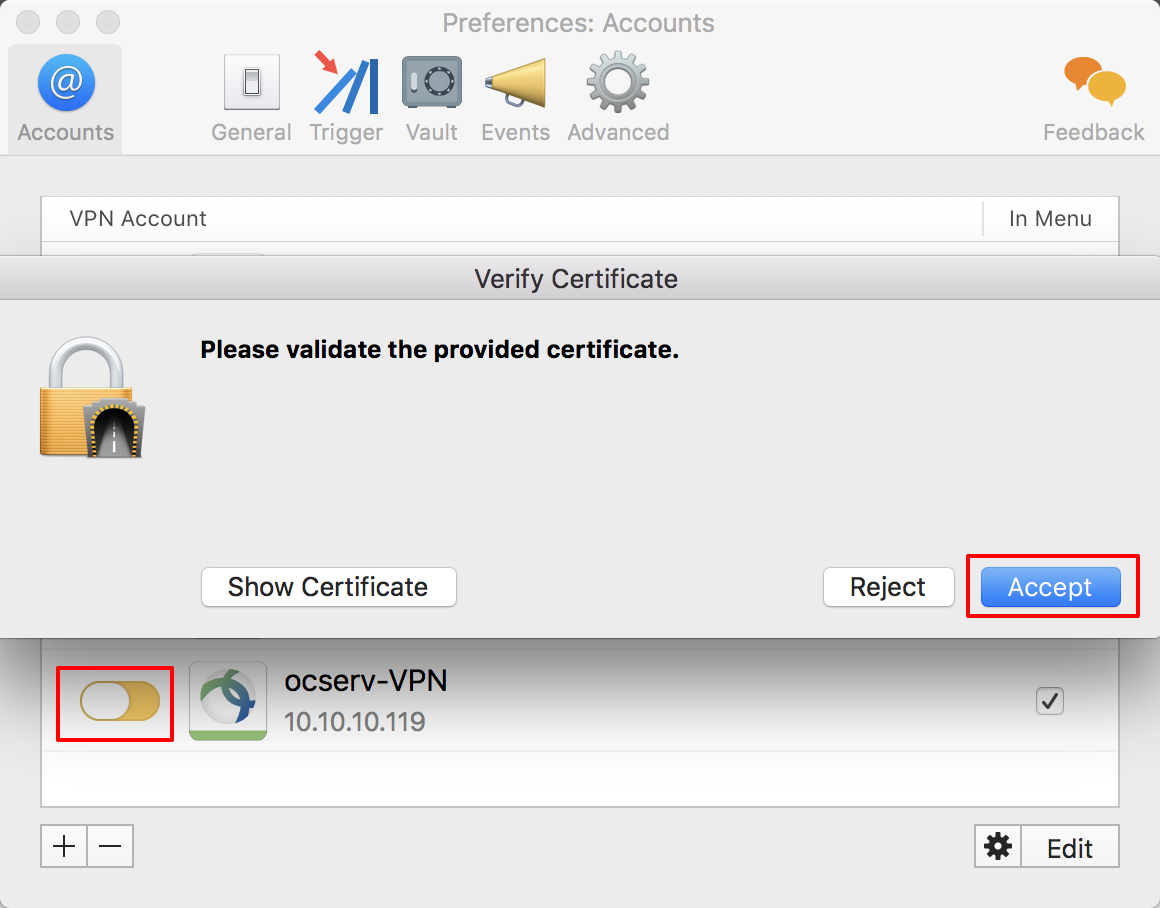
回到Accounts,启动vpn,并选中Accept。
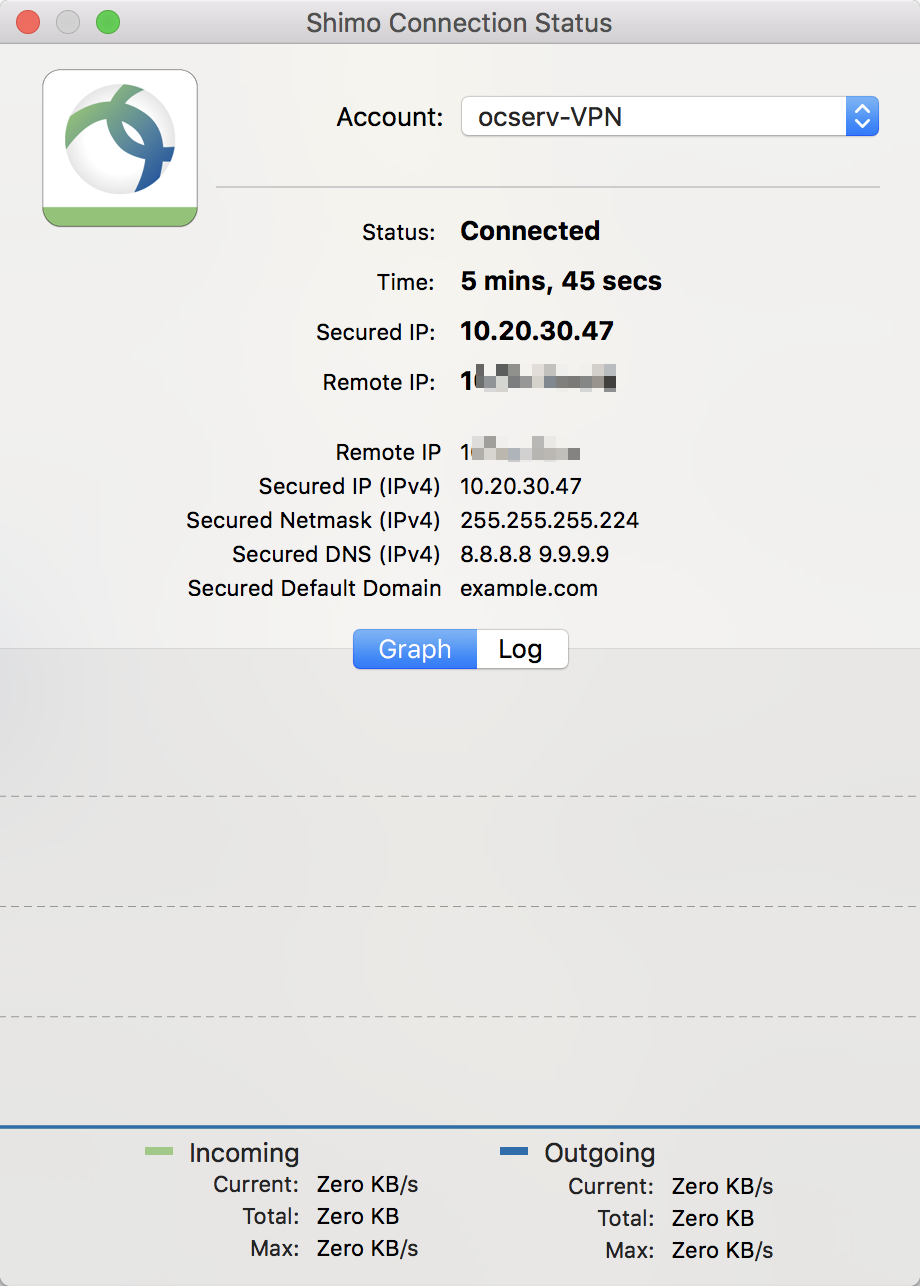
单机任务了Shimo,选择connection status可查看客户端信息
3.2.3 win客户端使用 win端,尝试过,但失败了,因为现实需求考虑,不往下走了,读者可参见文末链接部分。
4 定制路由 本部分类容为私人笔记,仅供参考。 route no-route不能同时使用。下为个人收集ip、域名信息。
1
2
3
4
5
6
7
8
9
10
11
12
13
14
15
16
17
18
19
20
21
22
23
24
25
26
27
28
29
30
31
32
33
34
35
36
37
38
39
40
41
42
43
44
45
46
47
48
49
50
51
52
53
54
55
56
57
58
59
60
61
62
63
64
65
66
67
68
69
70
71
72
73
74
75
76
77
78
79
80
81
82
83
84
85
86
87
88
89
90
91
92
93
94
95
96
97
98
99
100
101
102
103
104
105
106
107
108
109
110
111
112
113
114
115
116
117
118
119
120
121
122
123
124
125
126
127
128
129
130
131
132
133
134
135
136
137
138
139
140
141
142
143
144
145
146
147
148
149
150
151
152
153
154
155
156
157
158
159
160
161
162
163
164
165
166
167
168
169
170
171
172
173
174
175
176
177
178
179
180
181
182
183
184
185
186
187
188
189
190
191
192
193
194
195
196
197
198
199
200
201
202
203
204
205
206
207
208
209
210
211
212
213
214
215
216
217
218
219
220
221
222
223
224
225
226
227
228
229
230
#2017-11-20 域外app域名及ip dns8.8.8.8 vps地址AWS-Tokyo #iOS configuration.apple.com init.itunes.apple.com device-prisioning.googleapis.com 15-courier.push.apple.com gateway.icloud.com itunes.apple.com #google google.com gmail.com youtube.com www.google.com.hk #duckducogo.com 46.0.0.0/8 #twitter twitter.com twimg.com api.twitter.com #telnetgram 149.154.0.0/16 91.0.0.0/8 #wikileeaks.org 95.0.0.0/8 #facebook graph.facebook.com b-graph.facebook.com #api.weather.com 23.0.0.0/12 104.64.0.0/10 #proton.flurry.com #data.flurry.com proton.flurry.com 68.142.192.0/18 #settings.crashlytics.com 23.20.0.0/14 #api-m.paypal.com #www.paypalobjects.com #b.stats.paypal.com #analytics.query.yahoo.com #stats.appsflyer.com #t.appsflyer.com #stats.appsflyer.com #e.crashlytics.com #chatrelay.bittorrent.com #textsecure-service.whispersystems.org #ws.batch.com #events.mobile.optimizely.com #s3.amazonaws.com #workflow.is #stats.justyo.co #z.moatads.com #sb.scorecardresearch.com #buffalo-ios.ifttt.com #shimovpn #www.ip138.com #CIDR汇总 184.24.0.0/13 104.244.40.0/21 104.64.0.0/10 107.178.192.0/18 17.0.0.0/8 172.217.0.0/16 174.129.0.0/16 173.0.80.0/20 176.28.32.0/21 147.135.128.0/17 157.240.0.0/16 116.0.0.0/8 119.0.0.0/8 149.154.0.0/16 124.0.0.0/8 203.130.55.109/32 #ip138.com 240.0.0.0/4 216.58.192.0/19 216.115.96.0/20 210.0.0.0/8 8.0.0.0/8 88.0.0.0/8 91.0.0.0/8 95.0.0.0/8 54.80.0.0/12 54.72.0.0/13 54.240.0.0/12 54.224.0.0/12 54.192.0.0/12 52.208.0.0/13 52.192.0.0/11 52.88.0.0/13 52.84.0.0/14 52.48.0.0/14 52.32.0.0/11 50.16.0.0/14 46.0.0.0/8 4.0.0.0/8 31.0.0.0/8 34.192.0.0/10 23.0.0.0/12 23.20.0.0/14 23.32.0.0/11 23.64.0.0/14 23.192.0.0/11 68.142.192.0/18 66.6.32.0/20 69.147.64.0/18 64.4.240.0/21 64.4.248.0/22 74.6.0.0/16 ################################################## ##2017-11-20国内日用地址 dns8.8.8.8 AWS-Tokyo #wechat 183.232.96.107:443 203.205.151.193:80 #QQ 203.205.158.62:443 203.205.142.168 203.205.151.50:443 183.57.48.91 140.207.123.187:80 103.7.30.100 14.17.42.37:14000 #IP.cn 23.239.1.72 #网易云音乐 103.211.228.142:443 1.1.1.1:80 103.211.228.142 223.252.199.69:6003 114.134.80.166:443 #CIDR合并 1.1.1.1/24 14.16.0.0/12 //16~31 103.7.28.0/22 //28~31 103.211.228.0/22 //228~231 114.134.80.0/24 140.206.0.0/15 //206~207 183.192.0.0/9 //扩大话处理,准确是192~255 183.0.0.0/10 //0~63 203.205.128.0/19 //128~259 223.252.192.0/19 //192~223 23.111.248.0/8 //23.111.248.0 - 23.252.65.255 103.211.228.0/22 //228~231 ##2017-11-17国内日用地址 dns223.5.5.5 119.29.29.29 8.8.8.8 电信 #wechat 59.37.97.23:443 #mac-app 101.227.169.159 #weixin.qq.com #网易云音乐 223.252.199.69:6003 #mac-app 59.111.160.195 #music.163.com #QQ 14.17.32.211 #qq.com 61.151.168.139:80 61.151.225.32:80 183.36.108.140:14000 183.66.103.146:80 183.36.108.140:14000 183.57.48.91 #weiyun.com 183.3.226.30:80 101.226.90.186:80 180.97.8.111:443 180.163.21.59 #user.qzone.qq.com 14.215.140.64:80 14.215.138.22:80 182.150.10.139:80 118.112.22.144:443 113.105.73.144:80 125.94.49.26:80 #dingding 59.63.233.95:443 140.205.254.81:443 140.205.32.80:443 140.205.34.62:443 140.205.34.62 #dingtalk.com 140.205.34.53:443 140.205.134.70:443 140.205.172.18:443 140.205.254.81:443 140.205.164.47:443 106.11.6.1:443 183.66.67.134:443 106.11.249.208:443 106.11.172.38:443 106.11.61.140:443 106.11.250.9:443 106.11.6.1:443 106.11.94.2:443 150.138.144.180:443 117.21.189.111:443 117.41.240.227:443 119.84.36.229:80 183.66.67.134:443 175.6.241.225:443 114.55.84.136:443 112.67.242.154:443 121.199.250.56:443 118.112.15.6:443 180.163.159.109:443 202.105.176.125:443 #ip.cn 140.205.34.62 #汇合 223.4.0.0/14 #阿里DNS 119.28.0.0/15 #腾讯云DSN 183.0.0.0/10 #广东电信 140.205.0.0/16 #ip.cn 59.32.0.0/12 #wechat-class 101.224.0.0/13 223.252.192.0/19 #网易云 59.111.128.0/17 14.16.0.0/12 #QQ 61.151.0.0/16 183.0.0.0/10 183.64.0.0/13 180.96.0.0/11 180.160.0.0/12 14.208.0.0/12
5 参 https://ocserv.gitlab.io
https://lowendbox.com/blog/install-openconnect-server-on-ubuntu-16-04/
https://xuri.me/2016/03/19/ocserv-on-ubuntu-16-04-for-cisco-anyconnect-client.html